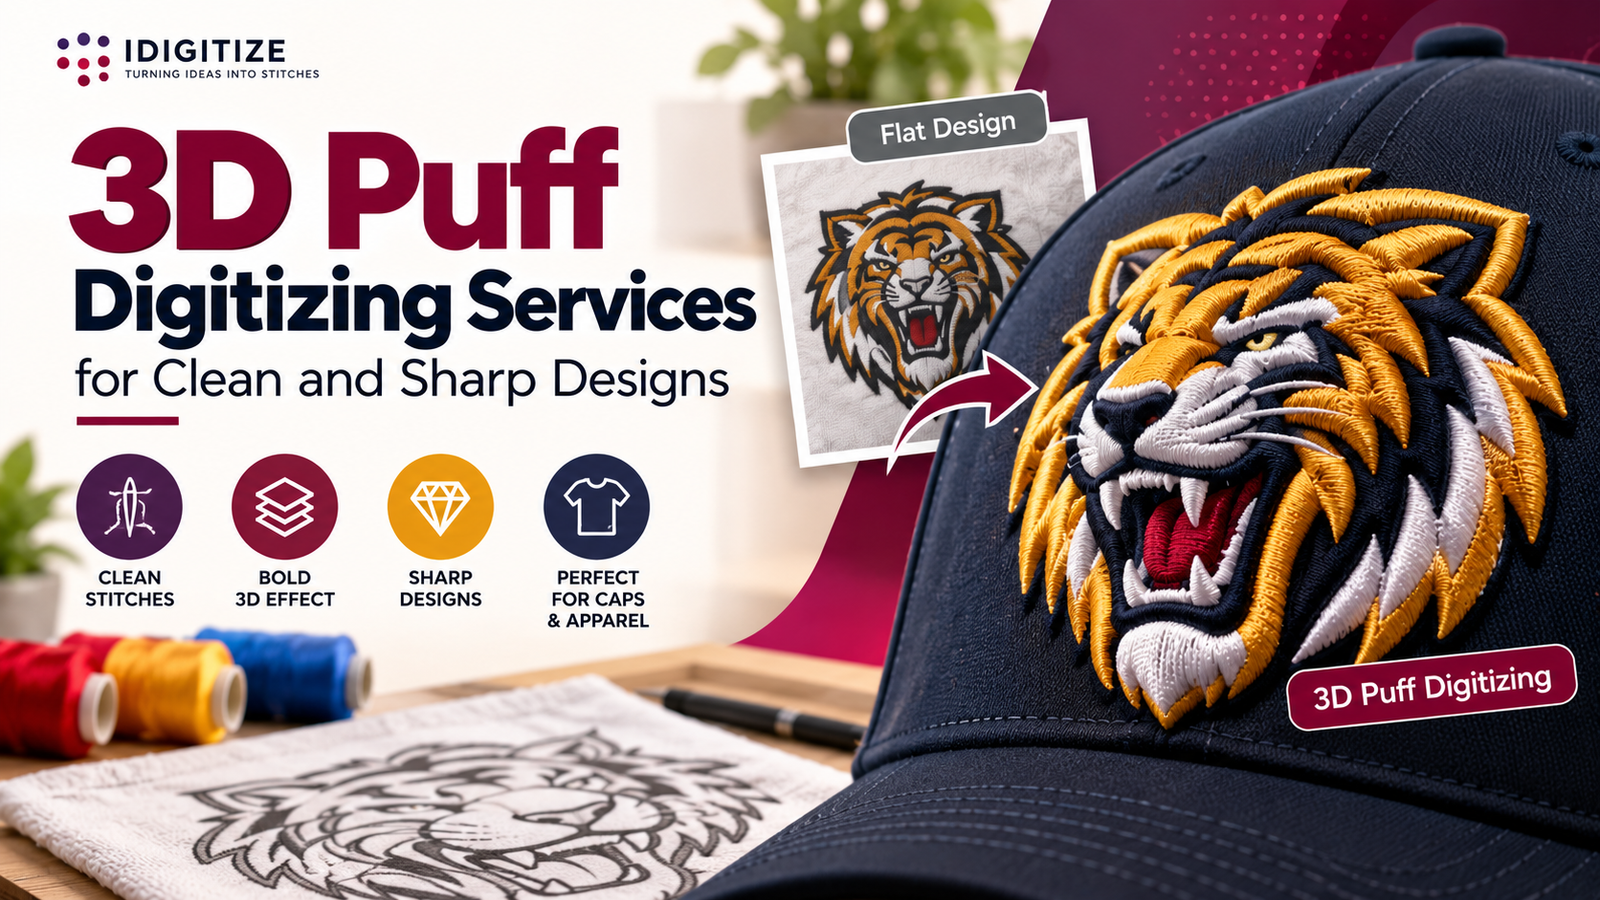
Clean 3D puff embroidery starts with artwork that has been prepared for the raised effect. With our online 3D puff digitizing services, we convert artwork into stitch instructions while considering foam coverage, stitch direction, density, lettering, edges, and final design size. Our 3D puff digitizing services focus on creating a clear stitch structure for bold designs that need a clean and sharp raised appearance.
At iDigitize, we treat puff embroidery differently from standard flat embroidery. The foam beneath the thread adds height, which changes how letters, corners, outlines, and other design elements need to be prepared. We consider these details before organizing the embroidery file for production.
What Makes a 3D Puff Design Look Clean?
A clean 3D puff design depends on the relationship between the artwork, foam, and stitch structure.
The raised effect alone does not make embroidery look sharp. The digitized file also needs to define how the stitches cover the foam and form the individual shapes.
Important factors include:
-
Suitable artwork
-
Clear design dimensions
-
Proper stitch direction
-
Controlled density
-
Defined edges
-
Suitable lettering
-
Logical stitch sequencing
-
Clear separation between raised and flat areas
Our 3D puff digitizing services consider these elements together rather than treating them as separate settings.
The goal is to prepare the artwork so its important visual features remain recognizable after they are converted from digital shapes into thread.
Start With Artwork That Suits 3D Puff
Not every part of a digital design is equally suitable for raised embroidery.
3D puff works best when an element has enough width and space to hold the foam beneath the stitches. Bold shapes give the digitizer more room to build the raised structure.
Artwork suitable for puff may include:
-
Bold letters
-
Initials
-
Numbers
-
Thick logo shapes
-
Simple symbols
-
Wide borders
Very thin lines, tiny text, and highly detailed artwork provide less room for the raised construction.
Before we begin, knowing the final embroidery dimensions helps us judge how much physical space is available for each element.
Separate Raised Areas From Flat Embroidery
Some designs look better when only selected elements use 3D puff.
For example, a main logo word may be raised while smaller text or background details remain flat. These sections need to be identified before digitizing.
We plan raised and flat elements separately because they perform different roles within the embroidery design.
If your artwork contains both techniques, tell us which sections should use foam. This gives our online 3D puff digitizing services clearer information about how the final design should be structured.
It also helps us plan the stitch order around the different embroidery areas.
Build Clean Edges Around the Foam
Edges are especially important in 3D puff embroidery because they define the outside shape of the raised section.
The foam sits beneath the top stitches. If the edge construction does not suit the design, the outer shape may not have the intended appearance.
Corners, curves, letter ends, and other boundaries need careful planning.
We consider where a raised element begins and ends and how the stitches should interact with the foam in those areas.
This is different from simply taking a normal embroidery design and placing foam underneath it. The stitch structure needs to be planned for the raised effect from the beginning.
Keep Raised Lettering Sharp and Readable
Bold lettering is one of the most common design styles used for 3D puff embroidery.
The extra height can give letters a strong visual presence, but the characters still need enough room to form clearly.
When we prepare raised lettering, we consider:
-
Letter width
-
Character height
-
Stroke thickness
-
Spacing
-
Curves
-
Corners
-
Final embroidery size
-
Relationship between neighboring letters
Narrow characters and tight spaces can leave limited room for foam and thread.
Our 3D puff digitizing services evaluate the lettering at its intended embroidery dimensions rather than judging it only from enlarged artwork on a screen.
Use Stitch Direction to Define the Design
Stitch direction influences how a raised shape is visually formed.
A straight letter, curved character, thick symbol, and rounded logo element may not all need the same stitch direction.
We plan the direction according to the shape being embroidered.
Changing stitch angles between neighboring elements can also help separate different parts of the artwork visually. This can be useful when a logo contains several raised shapes positioned close together.
The direction should support the design rather than being applied identically across every section.
Control Density Instead of Simply Adding Stitches
More stitches do not automatically create cleaner puff embroidery.
The stitches need enough coverage to work with the foam, but excessive density can create unnecessary thread buildup. Density therefore needs to be considered alongside the size and structure of the raised element.
We look at factors such as:
-
Element width
-
Stitch type
-
Foam area
-
Stitch direction
-
Overlapping sections
-
Final design size
-
Surrounding embroidery
With 3D puff digitizing services, we build density around the requirements of individual design elements instead of applying one setting to the entire artwork.
Give Corners and Curves Extra Attention
Sharp corners and smooth curves help define the character of a logo.
These areas become especially important in raised embroidery because foam adds physical height beneath the thread.
A square letter may contain several corners, while a rounded letter requires a completely different outer shape. The digitized stitches need to follow those forms appropriately.
We consider the structure of each raised element so the stitch path relates to its actual shape.
This becomes particularly useful for logos where the visual identity depends on distinctive letterforms, symbols, or borders.
Keep Enough Space Between Raised Elements
Spacing matters in 3D puff designs.
If raised letters or shapes sit very close together, the additional height can make the individual elements harder to distinguish. The design should provide enough room for each raised section to maintain its intended form.
This is particularly relevant for:
-
Closely spaced lettering
-
Small gaps inside letters
-
Multiple raised outlines
-
Symbols placed beside text
-
Detailed logo elements
We review spacing at the final embroidery size because a gap that looks large on a computer screen can become much smaller when the artwork is reduced.
Plan Stitch Sequencing for a Cleaner Design
Stitch sequencing determines the order in which the embroidery machine creates the different design elements.
A mixed design might contain flat embroidery, raised lettering, background details, and several colors. These sections need a logical embroidery order.
We consider how each element relates to the next one and where the puff sections fit into the overall design.
For example, flat supporting details may need to be treated separately from a large raised logo element.
A planned sequence helps create an organized embroidery file and is an important part of our 3D puff digitizing services.
Avoid Details That Become Too Small
A logo can look perfectly sharp on a computer screen while containing details that become extremely small at embroidery size.
This happens because digital artwork uses pixels or vectors, while embroidery uses physical thread.
Potential problem areas include:
-
Very small lettering
-
Thin outlines
-
Narrow gaps
-
Tiny symbols
-
Complex corners
-
Fine decorative lines
If an element needs to use puff, available space becomes even more important because the foam must sit beneath the stitches.
Providing the intended design dimensions before digitizing helps us evaluate these details in the correct context.
Common Problems That Can Reduce Design Clarity
Several preparation issues can affect the clean appearance of raised embroidery.
Using Thin Artwork for Puff
Thin elements may not provide enough space for a strong raised effect.
Making Letter Spacing Too Tight
Characters placed too close together can lose visual separation when height is added.
Using Excessive Stitch Density
Adding more stitches is not always the solution. Excessive density can create unnecessary thread buildup.
Ignoring the Final Size
A detailed logo may need different considerations when reduced to a smaller embroidery area.
Treating Puff Like Standard Embroidery
A flat embroidery file is not automatically prepared for foam. Raised sections need specific planning.
Not Identifying Puff Areas
If only certain elements should be raised, they should be clearly identified before digitizing begins.
What We Need Before Preparing Your Design
Providing complete information helps us prepare the embroidery file around your intended application.
For online 3D puff digitizing services, you should provide:
-
Clear artwork
-
Final embroidery dimensions
-
Intended embroidery placement
-
Elements that should be raised
-
Elements that should remain flat
-
Required embroidery file format
-
Relevant color details
-
Any important design instructions
The clearer the project information, the easier it is to understand how you want the design structured.
Prepare the Correct Machine File
After digitizing, the design needs to be prepared in a format suitable for the embroidery machine or software being used.
Common embroidery file formats can include:
-
DST
-
PES
-
EMB
-
EXP
-
JEF
-
VP3
-
HUS
-
XXX
The required format depends on the production equipment.
Simply changing a JPG or PNG file extension does not create embroidery instructions. The artwork first needs to be digitized so the file contains stitch information that the embroidery system can interpret.
Get Your Raised Design Ready for Embroidery
At IDigitize, our 3D puff digitizing services prepare artwork around the structure of raised embroidery. We consider foam areas, lettering, spacing, edges, stitch direction, density, sequencing, final dimensions, and file requirements so the design is organized for its intended embroidery application.
You can send us your artwork along with the final size, placement, required file format, and details about which elements should use puff. This information helps us understand how your design should be prepared before embroidery production.
Frequently Asked Questions
What are 3D puff digitizing services used for?
3D puff digitizing services prepare artwork for raised embroidery that uses foam beneath selected stitches. The digitized file defines stitch direction, density, sequencing, raised areas, and other embroidery instructions needed to translate suitable artwork into a dimensional design.
How can I make a 3D puff design look sharper?
Start with bold artwork, suitable spacing, clear lettering, and accurate final dimensions. Thin lines and tiny details can be difficult to reproduce as raised embroidery. Proper stitch direction, foam coverage, edge planning, density, and sequencing also need to be considered during digitizing.
Can small lettering be used for 3D puff embroidery?
Small lettering can be challenging because puff embroidery needs enough physical space for foam and covering stitches. Very narrow characters, thin strokes, or tight spacing may provide limited room for the raised structure. The final embroidery size should therefore be considered before deciding which lettering will use puff.
Can a logo use both flat and 3D puff embroidery?
Yes. A design can combine flat embroidery with selected raised elements. For example, the main lettering may use 3D puff while smaller supporting text remains flat. You should clearly identify the sections you want raised when sending your artwork so we can understand the intended design structure.
What should I provide before 3D puff digitizing begins?
Send us clear artwork, the intended embroidery dimensions, placement, required machine format, and information about which elements should be raised or remain flat. Relevant color and design instructions can also help us understand how you want the final embroidery file prepared.

 English
 French
 Spanish
 Portuguese
 Deutsch
 Turkish
 Dutch
Dutch
 Italiano
 Russian
 Romaian
 Portuguese (Brazil)
 Tiếng Việt